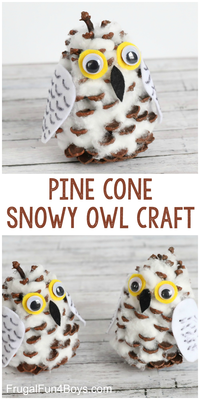
Turn a pine cone into an adorable snowy owl craft! This project is great for kids because the process is a lot of fun and the final product is so cute. Combine this owl craft with a book about snowy owls, and you’ve got a great science lesson for winter!

Supplies Needed:
- Pine cones – you’ll want them to be a good size. Not huge, but not small either.
- Black, yellow, and white felt
- Googly eyes – large
- Sharpie marker
- Cotton balls – about 15 per owl
- Hot glue or Tacky Glue
How to Make Pine Cone Snowy Owls
The first step in making this pine cone snowy owl craft is to stuff the pine cones with cotton balls. Before stuffing the pine cones, pull the cotton balls apart into smaller pieces. Kids love this process and it’s great fine motor practice!
Poke the cotton in between the scales of the pine cone. Once your pine cone is adequately “snowy,” it’s time to move on to making the eyes, beak, and wings.
Cut out wings from white felt. We used a black Sharpie marker to draw some patterns on the wings. Real snowy owls have black markings as juveniles, which they lose as they age. Adult males are almost completely white, while adult females have small amounts of black barring.
Cut out a beak from black felt and two circles from yellow felt. You’ll want the yellow circles to be slightly larger than your googly eyes. Glue the googly eyes to the yellow circles with hot glue or Tacky glue. Then you’re ready to assemble your owl! Glue on the eyes, beak, and wings. Make sure that each item is glued to the actual pine cone (not just the cotton) in at least one spot. If the felt is glued only to the cotton balls, you can pull it right off again because the cotton is not really attached to the pine cone.
Now you’re done and your snowy owl is ready to display!